I've been taking Wordpress for a test drive and so far I'm liking the format. I'm playing with one of the free themes over there, trying to decide which one fits my needs best before I purchase. If you'd like to leave feedback about what you see, please do, I'd appreciate it.
You can see my latest two blogs over there. The address is:
wildness.me
Monday, May 13, 2013
Wednesday, May 8, 2013
Pickled Green Almonds and Salted Green Almonds

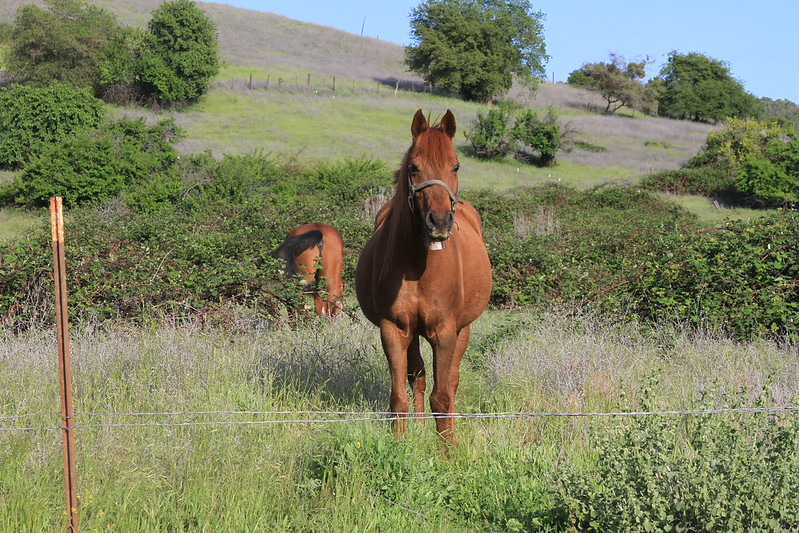
For the most part, I like growing nut trees. They're easy to care for and pretty do what they are supposed to do without much help from me. They aren't 'foraged food', but there is a certain aspect of 'vintage food' in them. Fortunately, I have several sweet almond trees in my yard. Unfortunately, I've never eaten a ripe almond from them. Why? Squirrels. By the time the almonds are ripe, there aren't any left.
The almond trees are located farther away from the house from my other nut trees. Farther away from the dogs normal patrol route. So the squirrels steal with impunity. They will clean out my tree, and do a better job than any mechanical harvester can do. When I walked near the tree, a squirrel would sit in the branches, a green nut clamped in his paws and bark at me.
And even though I routinely remove squirrels from the population, within a day or two, another replacement moves in to take over the territory.
I was talking to a neighbor early one spring, and he surprised me by reaching up and picking a fuzzy green almond and popping it into his mouth. When I expressed a 'blink-blink' reaction, he told me that in his culture (he's Palestinian), green almonds are a treat.
So, I tried one. It was crunchy and fuzzy and bland. The drupe inside (what grows up to be what we call the 'nut') hadn't formed yet and there was a sort of clear jelly in it's place. It was not unpleasant, but at the same time it wasn't entirely pleasant, either. 'Salt', my neighbor said, 'They are better with salt'. So I ran up to the house and brought a shaker of sea salt back to the tree. Frankly, I didn't think the salt made much difference. It was still just a crunchy, fuzzy green thing. I suppose it's one of those things that you just have to be raised with to appreciate.
I was disappointed because I hoped to find something to do with my almonds prior to their being devoured by the squirrels.
Then I noticed everyone doing things with unripe black walnuts. Pascal pickles green black walnuts and Hank makes nocino (a liqueur made from the unripe walnuts), and I wondered 'What can I do the with green almonds?'
My first experiment pickling them, didn't go well. I soaked them same way green walnuts are soaked for a couple of weeks. It just didn't work. I suppose because the green almonds don't have the load of tannins that the walnuts do.
So then I just pickled them like I would any vegetable. I tried a batch with sweet spices (rice vinegar, cinnamon, cloves and the like) and a more savory blend (white vinegar, chilis, bay and garlic). Both were a hit. The fuzz disappears, the crunch gets a bit softer. They pair nicely with a good cheese and a cracker or in an antipasto.
You lose, Squirrels.
Saturday, May 4, 2013
Elderflower Panna Cotta with a Wild Blackberry Gelee
.jpg)
Panna Cotta was originally made with cream fresh from someone's cow. It's difficult to find fresh, unpasteurized cream any more due to (cough-cough) health concerns.
If you don't have access to a cow or it's cream, I've included the modernized recipe to make it easier. Even though you have to do a few extra steps to make it's creamy goodness, it's still easy and worth every minute.
Start by preparing your 3 serving dishes. Panna Cotta can be served in just about any sort of a bowl that you like, I used martini glasses just to show off the layers. (Seriously. I wouldn't serve them to my family like this. I have big dogs and dinner time can be precarious. I once dropped a coconut cream pie to the floor. There is no 5 second rule in this house. All 4 dogs were on it in a heartbeat scarfing and growling and slobbering. For weeks after they skulked about the table, hoping another pie would miraculously appear on the floor. Alas. It hasn't. However, say the dogs, eternal vigilance is the price of a pie.)
Ingredients
1 3/4 cups heavy cream
2 tablesppons sugar
3 tablespoons Elderflower cordial
1/2 cup fresh or frozen berries
1 to 2 envelopes powdered gelatin
Place a 1/4 cup cream in a bowl and sprinkle with 1 and a half teaspoons of powdered gelatin. Let gelatin soften for 5 or 10 minutes.
Place the other 1.5 cups of cream in a saucepan. Whisk in 2 tablespoons of sugar and 3 tablespoons of elderflower cordial. Place on stove and bring to a simmer. Continue to whisk while adding gelatin mixture. When the cream begins to simmer again, remove from heat and divide evenly into your serving bowls, martini glasses, whatever.
Place in the refrigerator to let it firm up, while preparing the second layer.
Measure 1/4 cup of water into a bowl and sprinkle 1 teaspoon of gelatin over it. (You can 'fudge on the amount of gelatin that you use here. I like it a little softer, so I use less gelatin. You may like it a little harder. It's totally up to you.) Let the gelatin soften for 5 or 10 minutes. Place 3/4 cup of water in a saucepan, add 2 tablespoons of sugar and a 1/2 cup berries. Add the gelatin mixture, stirring constantly and let the mixture come to a simmer. Remove from heat. Pour the berry mix into a heatproof liquid measuring cup and let it sit until it comes to room temperature. This step important, because if the mixture is too hot, it will melt the layer of panna cotta underneath and you'll end up with a muddy mess.
When the berry mixture is cooled to room temperature, carefully pour in equal amounts over the panna cotta layers. Then refrigerate for an hour for gelatin to set.
Hard Manzaita Cider!
Hard apple cider (HAC) begins with a simple starter that is made from an apple and apple juice. That's it. It's one of the easiest things to do in the kitchen.
I've been using that starter in a lot of things such as the pineapple chicha from an earlier blog. For a lot of my fermented recipes, it's taking the place of salt and whey. And it made this foray into hard manzanita cider really simple.
Manzanita berries:
I've made mancanita cider before (using Hank Shaw's recipe: http://honest-food.net/2010/08/22/manzanita-cider/) so I started with that, tweaking it slightly.
Mixe 2 cups of sugar with 10 cups of water, bring it to a boil and pour it over 4 cups of cleaned manzanita berries. Let it sit about 20 minutes and mash it up with a potato masher. No need to kill yourself mashing on this step. The idea is just to crack open most of the berries so that they can infuse more efficiently. Let it the mess sit overnight and then strain it.
Pour your cider into a carboy and add 1 cup of the HAC starter. (See the blog on Hard Apple Cider for directions. Remember the starter needs to made several days in advance of using it, so that it's all filled with bubbly goodness).
Slip on an airlock, or a balloon or whatever set up you use and leave it alone for a few days. # days if you like it sweet. Longer if you like it drier and with a little more alcohol to it.
When it's reached the flavor that you like, bottle, leave it alone for a day or two, then refrigerate it for about a week.
A really easy treat for some hot afternoon.
Elderflower Cordial. Not Lemon Syrup with Elderflower Undertones.

I've made elderflower cordial for a couple of years now and every year that I make it, I think 'I should have just made lemon syrup and saved myself a lot of time and trouble'.
I've tasted commercially produced cordials from Europe and they don't seem to be nearly as 'lemony' as the stuff we make at home here. The commercially prepared cordial tastes like elderflower with a bit of lemon for tartness. Yes, it does have some 'artificial flavors along with the natural ones, but it tastes a lot better than the 'lemon with floral undertones cordial' that the internet recipes produce.
Almost every recipe that I've seen calls for 3 or 4 whole lemons. That's a lot of lemon. Most recipes also call for boiling the flowers, or at the very least, using boiling water. The floral properties of the elderflower seem so fragile and delicate, that it I think that they're easily destroyed by heat. Flowers that are sweet and fragrant going in to the 'dunk' don't seem to transfer their lovely properties to the hot syrup and the overpowering lemons become prominent Of course, you need a little tartness to balance the saccharine sweetness of the syrup, but we're after a balance here, not a lemon syrup with a few floral undertones.

If you didn't read my earlier blog about how to handle fresh elderflowers, here's a recap:
-Pick elderflowers that are more cream-colored and less green-colored. You'll be able to compare the flowers on the tree to understand this. The greener flowers have unopened buds and won't add flavor.
-Make sure the flowers aren't dropping off the coymb. If they are, that head of flowers is too old. Leave them to produce berries for later use.
-Don't pick the flowers, put them in your pack, and continue on a few hour hike. The flowers will develop an unpleasant odor. Bring them home and refrigerate them.
-Don't rinse the flowers prior to using them. You'll wash away a lot of the delicate pollen which is where a lot of flavor comes from. Just shake them gently to get the bugs out. You'll find other bugs as you process the flowers and be able to remove them then, too.
-Remove all the green stems. Don't worry about the tiny white pedicles that hold the flowers on the stem. Yes, I know that seems like a big chore, but once you get the technique down (hold the blooms between your middle finger and forefinger and snip-snip-snip with the scissors) it goes pretty quickly. If you leave many green stems on, they add a 'rank' flavor to whatever your making. Besides, everthing on an elder other than the blooms and the berries are toxic.
-When you've cleaned out your bag, you may find quite a bit of pollen sticking to it's sides and bottom. Be sure to add that to whatever it is that you're cooking. The pollen adds flavor and is responsible for a lot of the sunshine color in your cordial.
For the cordial:
Use between 20 and 30 flower heads. Flower heads vary in size of course, so just use your judgement. You want to leave plenty of blooms for berry production, so take your blooms from several trees.
Make about 8 cups of simple syrup (1:1) and let it cool to about 100 degrees.
Pour it over the prepared flowers (see above).
Add 2 tablespoons of lemon juice. If you like, add a bit of lemon rind, but don't go overboard. Actually, you caould add all kind sof citrus instead of lemons. Try blood orange. Try limes. Try a Meyer lemon.

Add 2 teaspoons of citric acid. (Both the citric acid and the lemon juice helps to balance out the flavor of the cordial and the citric acid also acts as an anti oxidant to help preserve the color and as a natural preservative.
Cover and let macerate for 2 days.
Strain.

At this point the cordial is perfectly good to bottle. But I wanted to 'amp' up the elderflower flavor, so I did a sort of 'double-infusion', which sounds more complicated than it is. I gathered another 20 heads of elderflower, prepared them, added them to the syrup that I just strained and let them sit for another two day. If you wanted to add the tiniest bit of vanilla bean here, it would be a good time.

After sitting for two days, strain again and bottle.
This should keep about 4 months in the refrigerator If you wanted to reheat the strained cordial and then water-bath can for a longer shelf life, note that you will lose a bit of the beautiful color and scent. But it will still taste darn good. And not over-lemony.
The jar on the right has been through a water-bath. You can see that the heat has altered the color slightly.

Thursday, May 2, 2013
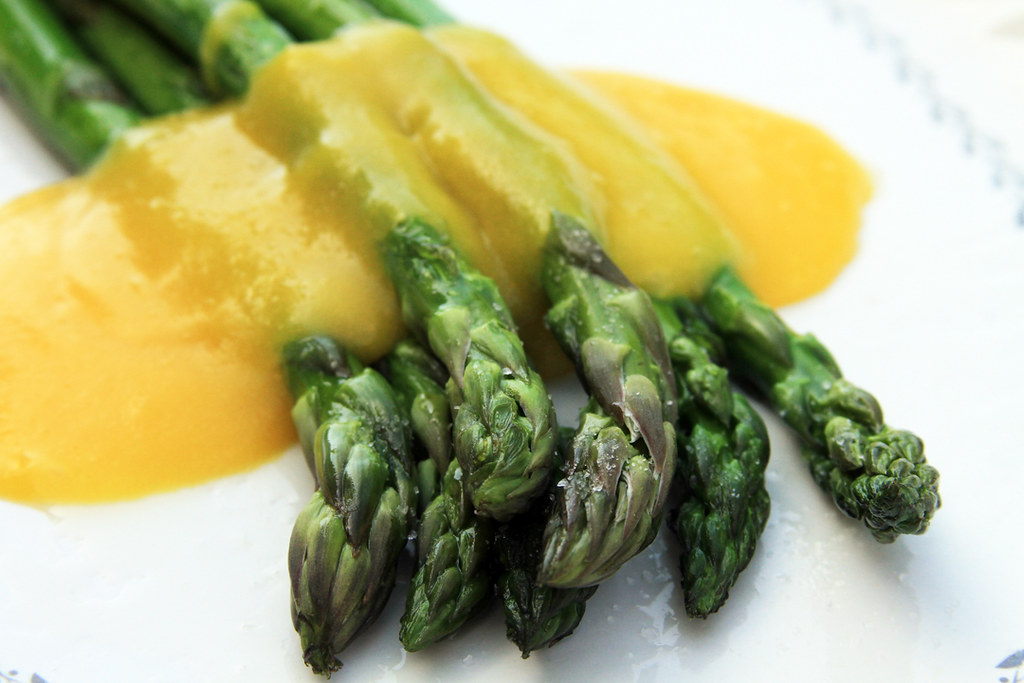
Asparagus with Elderflower Hollandaise
It's mid-spring here, but it's been hot and dry already. There is strength in the green grass yet, but shortly the emerald hills will change to the color of ginger and the constant worry of fire will be here. For now, I sleep with the windows open and relish the nightly delta breeze tickling my back. I try to engrave the feeling in my mind so that I can call it back up when the temperature rises to 110 degrees.
I'm making the most of what I consider 'spring foods' because they aren't going to last long once the sun rises a little higher in the sky.
Elderflower is on, perhaps a little bit early this year. It's abundant in this area which is a good thing, because I enjoy it's delicate floral essence and try to use it often.
Asparagus is abundant too, Asparagus always brings memories of my mother piling it on my plate and admonishing me: 'Asparagus is Jackie Kennedy's favorite vegetable'. Ok, Mom. But don't even come near me with a pillbox hat.
I wanted a way to mix those early spring flavors and naturally my thoughts turned toward Hollandaise and using the sauce to anchor the two foods.
Elderflower is wonderful to work with, but it takes care:
-Pick flowers that are more cream-colored and less green. The green ones have too many unopened buds to add any flavor.
-Make sure that the flowers aren't dropping off the corymbs as you pick it. If they are, it means those particular flowers are too old. Leave them to produce berries.
-Don't pick the flowers and then leave them in your pack for a few hours while you finish you're hike. Bring them home and refrigerate the blooms immediately.
-Don't rinse the flowers prior to using them. You'll wash away a lot of the delicate pollen which is where a lot of flavor comes from. Just shake them gently to get any bugs out. You'll find others as you work the flowers and you can remove them then.
-Remove all the green stems. Don't worry about the tiny white pedicles that hold the flowers, Yes, I know that seems like a chore, but once you get the technique down (sort of hold the blooms between you'r forefinger and middle finger and going snip-snip-snip with the scissors). If you leave the green stems on , they'll add a rank flavor to whatever you're making. Besides, any parts of the elder, other than the flowers and berries are considered toxic.
-When you've cleaned out your bag, you may find quite a bit of pollen clinging to the sides. Add it to whatever you're cooking to increase the 'elderflower' flavor.
As far as a recipe, if you have a favorite Hollandaise recipe, just use that. Simply gently poach a handful or two of cleaned elderflowers in the butter for a few minutes on very low heat. You can sieve out the flowers or not, your choice.
If you don't have a favorite recipe, here's mine:
Simmer 2 handfuls of elderflower (as described above) in 1/2 cup of unsweetened butter.
Whisk 4 egg yolks and a squeeze of fresh lemon juice together in a glass or stainless steel bowl (note that you'll be using this as a double boiler, so make sure it fits in another saucepan), until doubled in volume.
Place the bowl in a pot of simmering water (or use a double boiler if you have one), and continue to whisk the egg mixture constantly. If you let the mixture get too hot, you'll end up with scrambled eggs.
While still whisking, slowly add the infused butter. Whisk until mixture is doubled in volume and then remove from heat.
Whisk in a pinch of salt and cayenne pepper.
You can serve it over asparagus (or on the side) or as Eggs Benedict for a fancy brunch.
Monday, April 22, 2013
Pineapple Chicha
I like to use 'stuff' that normally gets thrown away. I especially like to use 'stuff' that ends up tasting yummy. And to take it a step further, using scraps and wild food to make any sort of alcohol, is sort of a win-win in the kitchen. But one of the best things about this recipe is that it's also delicious in it's non-alcoholic form.

If you decide to ferment this recipe, you'll need to make the apple cider starter for hard apple cider that I wrote about in my in my last blog. The starter is so versatile, I keep it on hand all the time. I keep it in the fridge and when I need it, just set it out at room temperature for a day to let the yeasts 'wake up' and start working again.
If you decide to leave it non-alcoholic, then omit the fermentation and just drink it hot or chilled.
We eat pineapple a couple of times of year, mostly during the holidays. It's sort of an expensive treat but the family loves ambrosia and I hate to say 'no'. But I'm left with a lot of peelings and the core, which always seemed such a waste.
And then I discovered 'Chicha'. I'll admit it, the first thing that comes to mind when someone says 'Chicha' is an old Andean Grandmother, chewing up corn and spitting it back in to the brew pot. Not a terribly appetizing idea for a beer for many reasons, not the least of which is the idea of that whole 'communicable disease' thing.
But the more I researched Chicha the more I found out it doesn't always involve spit. It also doesn't always involve blue corn. Chicha can be made with rice, pineapple, cassava, amaranth, peanuts, barley, cannabis, pineapple and more. And it doesn't actually have to ferment. Unfermented pineapple Chicha is a treat often served to children. And if you try it, you'll see why. It's delicious. Personally, I think the unfermented version would make a great fireside drink with a dash of rum...
You'll need the peelings and core from a pineapple.
5 quarts of water
1 pound of panela (or brown sugar)
2 handfuls of fermented blackberry tea leaves (see previous blog)
Spices (whatever suits your fancy. I used ginger, cinnamon, cloves, allspice, but wild spices would be great too)

Throw everything into a pot and simmer for about an hour.
Turn off heat and let sit overnight. Strain.
Now you have several options. You can chill it (it's delicious as is or with a bit of rum), you can heat it up and serve it as a hot drink (again, delicious with a splash of rum), or you can ferment it for a few days and make a very nice spicy beer with an alcohol content of about 3 percent.
To make the beer, just pour the strained liquid into your carboy, add about a cup of the hard apple cider starter (recipe in the previous blog), top it with an airlock and let it sit for a few days. You can taste it every day to see where on the scale you like it...sweeter or dryer. The dryer the brew the higher the alcohol content. If you're doing a lot of brewing, you might want to spend the 15 bucks and get in inexpensive hydrometer. When it reaches the flavor that you like, bottle it.

And that's all there is too it. A delicious drink and no waste.
Tuesday, April 16, 2013
Hard Apple Cider
My friends, Deane and Darren, have me making hard apple cider. There is nothing better on a hot day. And I can't think of anything else I make in the kitchen that takes less work. Really. You peel an apple. That's it.
Go to the store. Buy 2 half gallon bottles of apple juice and one organically grown apple. The juice doesn't have to be expensive, but it can't contain any nitrates or sufides or other preservatives. Added Vitamin C is fine and it can be pasteurized.
Open one bottle of juice and pour out about 1 cup. Peel the apple. Place the apple peel into the bottle of juice.
There you go. Most of the work is done.
Now just put the bottle in a nice warm spot (it doesn't have to be all that warm actualy, but it'll take longer), and wait. Shake the bottle up every day. After about 3 days, you'll start to see some small bubbles around the peel. If you open the lid, you might hear a slight 'shwoosh'. Wait another day. It may take up to 5 days, but the point is, when the bottle gets really hard and every time you open it you get a loud 'swoosh', then your starter is ready.
Now you have a couple of options. You can pour your second bottle of juice into a carboy, and add a cup of your stater, or you can do it the lazy way (my choice) and pour about a cup of the second bottle of juice out and replace it with one cup of your starter. At this point, you can put your original starter in the refrigerator and drink it. It's sweet, fizzy and delightful. Kids love it and there isn't enough alcohol in it at this point for it to be a concern.
So now you have your first bottle of juice (the starter) tucked away in the 'fridge, and your second bottle in either a.) a carboy with a fermentation lock or b.) still in the original jug that it came from the store in.
Now just wait. You can use a hygrometer, but I don't. I like my cider sweet, so I let it ferment for 4-5 days. Other people like a dryer cider and will let it ferment longer. Totally up to you.
If you've used the carboy, bottle up your cider when it reaches the stage that you like it. If you used the lazy woman's way, put it in the fridge. (You'll need to open the top every day to prevent too much gas buildup and making a mess in your refrigerator.) Then just pour it from the jug. It wont be quite as fizzy as if you bottled the cider in glass, but her, I hate washing bottles, so I'll put up with a very small amount of less 'fizzyness'.
It's delicious, cold and thirst quenching. And easy. Did I mention easy?
Now, wait and see what we can do with any leftover 'starter' in my next blog.
Tuesday, April 9, 2013
Homeness
So, I forage and write this blog for fun. It's my diversion, my getaway from real life.
I love my life and wouldn't have it any other way...but it's sort of complicated.
I spent a long time in school. A very long time. I studied chemistry and biology and genetics and thankfully, a lot of botany. I ended up with a bunch of degrees and a tittle that I used for awhile, but in the end, it was all sort of a waste.
I'd been living in Montana and had to come back to the 'ancestral home' to care for my mother, who suffers from Alzheimer's. It's a tough disease, but she is a tougher woman and she has fought the good fight, now she gets to rest and I get to help her.
I've watched a lot of things being born in my life. I've watched a lot of things die as well. Some deaths are hard and make you're heart swell with pain. Others seem sort of clinical. But there's always respect and a certain sanctity involved as someone bleeds their very essence, out to join the rest of the energy of the Universe.
Oh, enough deep thoughts.
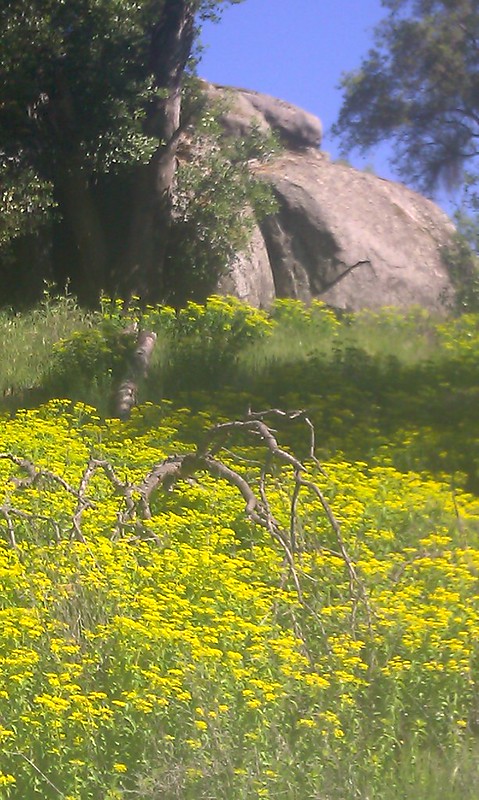
I'm fortunate, that even though this is California, I still live in the 'sticks'. 21 acres of pretty much nothing. No cable, still have dial-up, water comes from a well. There's a bar in town and a post office. I have to go to another town for groceries.
It's an oak woodland area, with large outcroppings of granite. Occasionally you find the grinding holes the early people used to grind acorns on the rocks.
I live here with an assortment of animals.
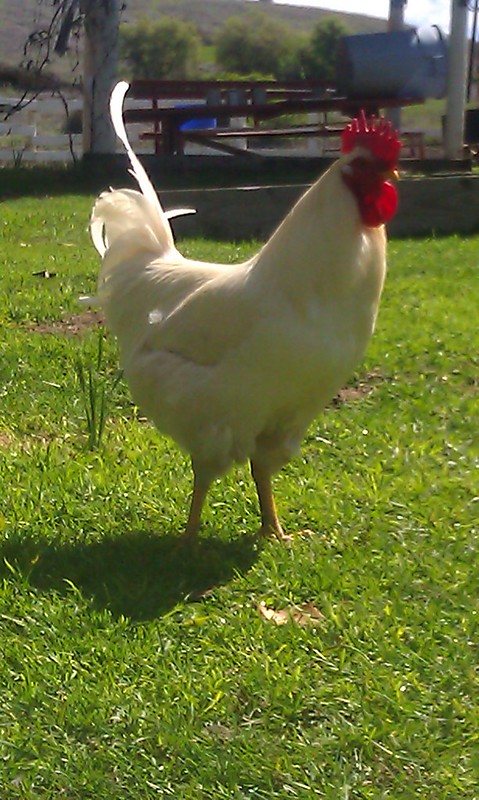
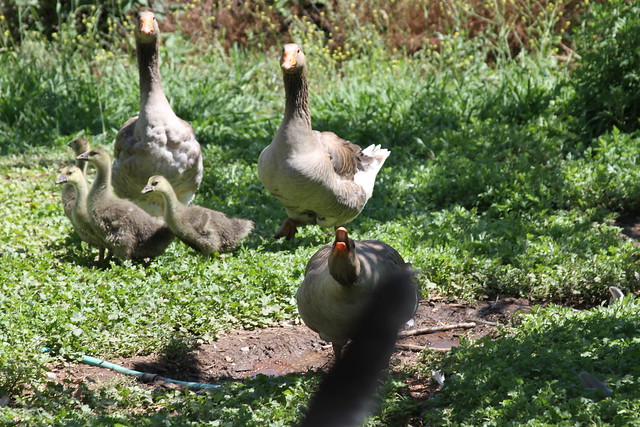
Chickens, ducks and geeses, for meat and eggs:
I only have two dogs, but I care for the neighbors two dogs. (The neighbors don't believe dogs need to come in at night, get fed on a regular basis, or go to the vet.) Oh, let's face it. I guess I have four dogs.
My 'lil sqeeze cheese' Veeta:

Wally, a rescued Catahoula:
 And Zeena and Bella (the two freeloaders)
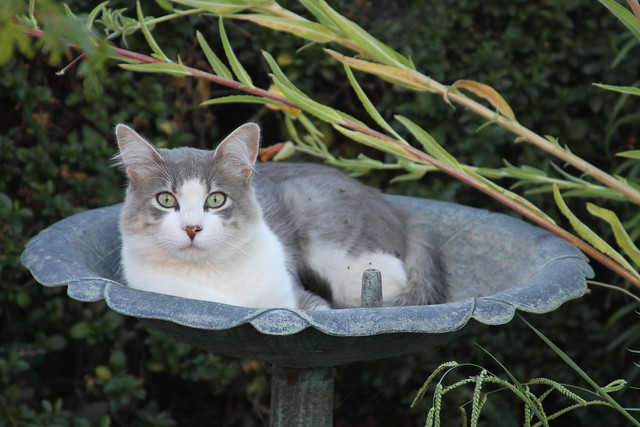
 One cat, whose name is uh...'Cat'.
 I lost a mare last year, 'Bouncing Betty' to moon-blindness. That leaves me with two.
Chief the clown:
 And 'Emma the Spoiled'
The occasional beef cow, goat or sheep comes through as well, but they are strictly transitory.
For a living, I raise medicinal herbs, but I don't make much money at it. If you can consider it a job I shill things like laundry detergent and health insurance on television Yep, I'm a sell-out. A commercial actress. Don't hold it against me, a girls' gotta make a living ;) Yes, it's a long way from the halls of academia, but it works for now.
So that's it. It's sort of the short hand for what goes on around here. There's lots of shoveling poop, lots of chores, lot's of laughter, lots of heartache. But it's a life.
I love my life and wouldn't have it any other way...but it's sort of complicated.
I spent a long time in school. A very long time. I studied chemistry and biology and genetics and thankfully, a lot of botany. I ended up with a bunch of degrees and a tittle that I used for awhile, but in the end, it was all sort of a waste.
I'd been living in Montana and had to come back to the 'ancestral home' to care for my mother, who suffers from Alzheimer's. It's a tough disease, but she is a tougher woman and she has fought the good fight, now she gets to rest and I get to help her.
I've watched a lot of things being born in my life. I've watched a lot of things die as well. Some deaths are hard and make you're heart swell with pain. Others seem sort of clinical. But there's always respect and a certain sanctity involved as someone bleeds their very essence, out to join the rest of the energy of the Universe.
Oh, enough deep thoughts.
I'm fortunate, that even though this is California, I still live in the 'sticks'. 21 acres of pretty much nothing. No cable, still have dial-up, water comes from a well. There's a bar in town and a post office. I have to go to another town for groceries.
It's an oak woodland area, with large outcroppings of granite. Occasionally you find the grinding holes the early people used to grind acorns on the rocks.
I live here with an assortment of animals.
Chickens, ducks and geeses, for meat and eggs:
I only have two dogs, but I care for the neighbors two dogs. (The neighbors don't believe dogs need to come in at night, get fed on a regular basis, or go to the vet.) Oh, let's face it. I guess I have four dogs.
My 'lil sqeeze cheese' Veeta:
Wally, a rescued Catahoula:
Chief the clown:
The occasional beef cow, goat or sheep comes through as well, but they are strictly transitory.
For a living, I raise medicinal herbs, but I don't make much money at it. If you can consider it a job I shill things like laundry detergent and health insurance on television Yep, I'm a sell-out. A commercial actress. Don't hold it against me, a girls' gotta make a living ;) Yes, it's a long way from the halls of academia, but it works for now.
So that's it. It's sort of the short hand for what goes on around here. There's lots of shoveling poop, lots of chores, lot's of laughter, lots of heartache. But it's a life.
Saturday, April 6, 2013
Wisteria Agua Fresca
The Wisteria (W. sinensis) is blooming around here. It's one of those plants that you either love or hate.
 My dad was one of those that hated the plant. One vine had grown, uninvited at one corner of our house. The tendrils slid under the shingles, between the rafters, and slowly began to tear the house apart. Dad ripped it out, stubbornly it returned. Dad poisoned it. The plant came back with a vengeance. Eventually a five-year war ensued to remove the vine from the skeleton of the house. For a couple of years, the battle seemed evenly matched, but finally the plant seemed to acquiesce and disappeared from the yard. But it was only a clever strategy. The root sat there for almost twenty years, waiting for it's nemesis to die. And soon, one morning not long after my father passed, I noticed a snake of a tendril creeping out from that long-dormant root and marching back toward a window casing.
The stuff is tenacious.
An abandoned homestead near me is a solid square of purple in the spring. The vine has shrouded an Italian Cypress. It's lovely in spots like this and reminds me of a ghostly plantation. Long racemes give the appearance of purple icicles dripping to earth. And the smell, oh my goodness, the smell. If angels wear perfume, it must come from the wisteria blossom.
The flowers of the Wisteria are edible. But only the flowers. The seeds, stems, leaves and bark are all toxic. Bring the flowers into your kitchen and your house will smell of spring for days. The problem is, the color of the flowers doesn't hold up in heat. Eating it in cold preparations or adding it just before serving a hot dish will keep the color nicely.
So the next couple of blogs will be focusing on ways to serve wisteria while maintaining the fragrance and the beautiful color of the flowers.
We drink a lot of agua fresca here in the summer. It's a light, fruity summer drink that utilizes just about any mixture of fruit and vegetables. Our summers get hot, and we often have days that max out about 110 degrees. Cooking anything is a chore. So an icy cold drink that just involves a whip in the blender is a treat. Normally, I might use tamarind, cantaloupes watermelon or even cucumber. Made with Wisteria, agua fresca takes on a whole new profile, fragrant and sweet-tart.
Whirl 3 cups Wisteria blossoms, 2 cups water, 4 tablespoons lime juice, 3 cups of water, a shot of simple syrup to suit your taste, and half a cucumber together in a blender. Strain. Serve over ice with a sprig of mint.
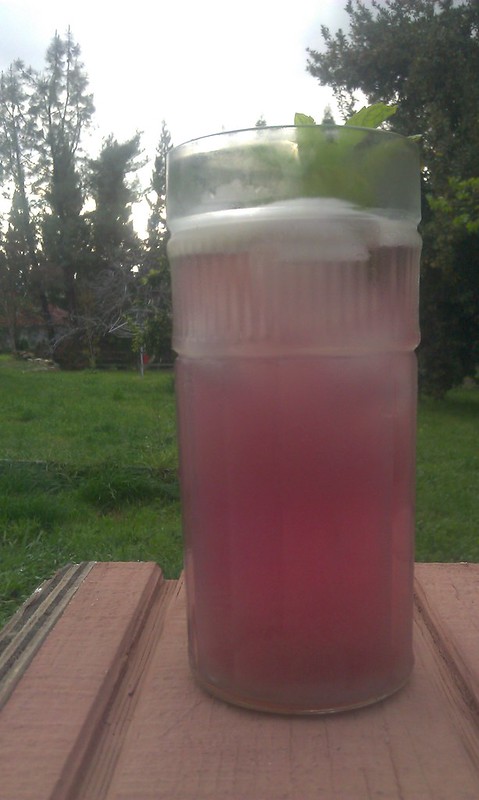 Now, sit back on a chaise lounge and enjoy.
The stuff is tenacious.
An abandoned homestead near me is a solid square of purple in the spring. The vine has shrouded an Italian Cypress. It's lovely in spots like this and reminds me of a ghostly plantation. Long racemes give the appearance of purple icicles dripping to earth. And the smell, oh my goodness, the smell. If angels wear perfume, it must come from the wisteria blossom.
The flowers of the Wisteria are edible. But only the flowers. The seeds, stems, leaves and bark are all toxic. Bring the flowers into your kitchen and your house will smell of spring for days. The problem is, the color of the flowers doesn't hold up in heat. Eating it in cold preparations or adding it just before serving a hot dish will keep the color nicely.
So the next couple of blogs will be focusing on ways to serve wisteria while maintaining the fragrance and the beautiful color of the flowers.
We drink a lot of agua fresca here in the summer. It's a light, fruity summer drink that utilizes just about any mixture of fruit and vegetables. Our summers get hot, and we often have days that max out about 110 degrees. Cooking anything is a chore. So an icy cold drink that just involves a whip in the blender is a treat. Normally, I might use tamarind, cantaloupes watermelon or even cucumber. Made with Wisteria, agua fresca takes on a whole new profile, fragrant and sweet-tart.
Whirl 3 cups Wisteria blossoms, 2 cups water, 4 tablespoons lime juice, 3 cups of water, a shot of simple syrup to suit your taste, and half a cucumber together in a blender. Strain. Serve over ice with a sprig of mint.
Wednesday, April 3, 2013
Prickly Pear Pie
Prickly pear cactus grow just about everywhere. I'm fortunate to have neighbors with huge stands of them. They've been there as long as I can remember and must be 15 feet high. Beautiful, ancient stands of them.
The fruit of the prickly pear is called a tuna. And they are delicious. They remind me a bit of a melon, but so very sweet.
But like a lot of things, you have to work to enjoy the goodness. The fruit and the pads are covered with spines called glochids. There are lot's of sites that you can google to see how best to navigate the spines, but my advice is 'move slowly'. When you get in a hurry, that's how you end up with a finger full of needles. I use tongs, heavy gloves and fire. You use what you're used to.
But once you have that wonderful fruit, here's a delicious pie you can make with them. It's not a traditional pie. It's more like a filled 'dutch baby'.
Filling:
3.5 cups prickly pear pulp. (The species near me has small seeds, so I don't worry about seiving them out. If the species that you are using has large seeds, you might want to remove them.)
1 cup sugar
1 cup water
Mix together in a medium saucepan and bring to a boil. Simmer until sugar is dissolved. Set aside.
Pie:
Preheat oven to 425 degrees.
Place 1/4 pound butter in a 13" x 9" baking dish. Put it in the oven while it is heating. You want the butter to be sizzling, but do not let it brown.
While the butter is melting, mix together:
In a blender, mix 6 eggs, 1 cup of milk, 1/4 cup orange juice, 1/2 cup sugar, 1 cup all-purpose flour, 1/4 tsp salt. Blend till frothy.
Remove butter from oven and immediately pour batter into the butter. Do not stir. Quickly pour prickly pear filling onto batter. Do not stir.
Place back into the hot oven for 20 minutes or until puffed and brown.
Serve immediately.
Tuesday, April 2, 2013
Acorn Polenta

I'm usually blessed with a fall abundance of acorns so this year I made acorn polenta.
If you can boil water, you can make polenta. It just takes patience. And there are a couple of rules.
Start with a rough acorn meal, not an acorn flour. Also, make sure that you've cold processed the acorns to remove tannins. Using a hot water method will destroy some of the delicate starches that are needed to make polenta the creamy dish that it is. Make sure there is not a trace of tannins left in the meal. This is very important. Any tannins remaining will become more pronounced as the starches break down and leave you with a bitter dish.
Also, you must stir the polenta for one minute every ten minutes. Use a heavy bottomed pot and a long wooden spoon. You must scrape the bottom and sides during your one minute stir-a-thon. If you don't, you'll end up with a burned pot.
Use 4 parts water to one part meal. Add the salt prior to adding the meal. It's too hard to get the salt distributed through the mass of starch otherwise. Whisk the cornmeal into the boiling water and stir often for the first few minutes. This will help avoid lumps.
Ready?
Bring 4 cups water to a boil in a heavy pot. (I used cast iron). Add 1 teaspoon of salt. When the pot is boiling hard, gradually whisk in 1 cup of acorn meal. It's important to go slow when adding the meal and whisk well. Once you've added all the meal, turn the heat down low. At a hard boil, the bubbles rising to the surface will burn you with splatter. You want a gentle heat, enough that the meal simmers, but not boils. Stir frequently during the first 10 minutes.
Set the timer for 10 minutes. At the end of 10 minutes, stir, scraping the bottom and sides for one full minute. Set the time again and repeat for 1 hour to 1.5 hours.
When the polenta is creamy add 1-2 cups of your favorite shredded cheese and 4 tablespoons of butter. . I use parmigiana or Gorgonzola and quickly pour into a loaf pan. Cool and slice.
Serve however you love to serve corn polenta.
Pineapple Weed Infused Angel Food Cake

I've been desperate to infuse a cake with elderflower this year. But there aren't any elder flowers blooming and probably won't be for several more weeks.
I was planning on making an angel food cake for Easter brunch tomorrow, so I just added the pineapple weed infused sugar that I made last week. I spooned fresh strawberries on top, but it's just as good plain.
Angel food cake is easy to make, but it does take a dozen eggs. Luckily, I have chickens that produce more than I can use on a daily basis. Eggs are easier to separate when still cold from the 'fridge, but beat up nicer when they are at room temperature. I crack my eggs the night before and whip them in the morning. Do what works best for you.
The nice thing about angel food is that it's a cake that can go 'gluten-free' without much change in texture. King Arthur flour has a nice recipe that I've used for my gluten free friends here:
http://www.kingarthurflour.com/recipes/gluten-free-angel-food-cake-recipe
Here's my recipe:
Whisk together 1 cup unbleached flour and 3/4 of a cup of the pineapple weed sugar in a bowl. In a large bowl mix 12 large egg whites and 1/2 teaspoon salt. Beat until frothy, then add 1.5 teaspoons of cream of tartar. Beat until stiff, glossy peaks form, then add another 3/4 of a cup of the pineapple sugar, adding 1/4 cup at a time.

Fold the dry ingredients into the beaten egg whites. Try to mix as little as possible so as not to break down the 'loft' of the egg whites.
Spoon the batter into an ungreased 10" angel food cake pan and bake in a preheated oven (325 degrees) on the bottom rack. The cake should be golden brown on top and spring back when you gently press on it.
Place the cake upside down to cool. If your pan doesn't have legs, put it over the top of a bottle so as not to crush the top.
Let the cake cool for at least an hour and a half.
To remove from the pan, run a spatula along the sides of the pan. Flip it over and it should drop out pretty easily.

Frost your cake if you like or drizzle it with a chocolate sauce or strawberries.
Thursday, March 28, 2013
Violet Jelly-Kitchen Magic
I don't make violet jelly every year. It's an on-again, off-again project for me.
But I've been asked to speak at a large gathering and bring 'pretty' foods. Violet jelly certainly qualifies.
It's a straight forward and easy recipe. I gather the violets over a week or so and store them in my freezer in a ziplock until I;m ready to make jelly. Decoct the violets in boiling water, add sugar and lemon juice and 'Presto-Chango', the color changes from violet blue to lavender pink.
Well, that's the theory anyway.
The lemon juice should alter the pH so that the anthocyanins (the color that's in things like violets and red cabbage) should change. If you keep the pH fairly neutral, you'll keep the blue-violet color. Go more to the acid side of the scale and you get a lavender, tip the scale to the alkaline side and you flatten the anthocyanins and get a yellow-ish green color.

I wanted a least a few jars to stay the dark violet-blue, so I opted not to add lemon juice.
Here's what I got:

No blue at all. That's when I realized that both my water and sugar are mildly acidic.
(sigh) No blue for me.
My friend Holly lives in an area where the water is very alkaline. Her jelly turned yellow. Tasted delicious but still yellow.
But I have to admit, they are still beautiful.
Here's the recipe. The intensity of the color of the jelly depends on how many violets you start with. Although the recipe called for 2 cups (which have resulted in a pink color), I amped it up to almost 4 cups of flowers.
Here's the recipe:
Pour 2 cups boiling water over 2 cups of violet flowers (I used almost 4 cups of flowers). Allow to sit overnight. Add 1/4 cup lemon juice (strain this well if you want clarity) and 4 cups of sugar. Bring to a boil. You can add a number of things for pectin (if you don't add pectin, you'll end up with violet syrup): crabapples, powdered pectin and liquid pectin. I've used all three but I wanted this jelly clear, so I opted for one package of liquid pectin. Boil for an additional two minutes. Skim, pour into jars, seal and process in a water bath for 10 minutes.
Easy-Peasey.
Wednesday, March 27, 2013
Molasses Days
Someone asked me when I was going to write a cookbook.
You've got to be kidding me. There are easier ways to make a living. In fact, I have nothing but sympathy for cookbook writers trying to make it in this world of Kindle, and Amazon and internet blogs. That's a tough gig. You put your heart and soul and years of work into a cookbook to have to go on publicity tours where you eat fast food and sleep in cheap motels and end up making about 25 cents out of every book sold.
That, ladies and gents, is a labor of love.
Besides, I'm not that great a cook. I'm more of a 'camp cook' rather than a chef. Give me a heart in deer camp and a bit of cast iron and I can turn it into a dinner you'll never forget. But I don't know how to 'plate' things. And actually, I don't care that I don't know how to 'plate' things. What I'm doing is spending a bit of my time doing something I enjoy, learning how the plants work and getting to know them on a more personal basis.
I'm a great forager. I know what to look for and when to look for it, can ID most trees just by their bark, know what stage to harvest the plant in, know what is good and what not to bother with. All those years of school and research and work make me great in the field. Dr. Oliver would be proud. But using the bounty and using it so that the tastes and textures compliment each other and having each dish a joy to eat? That's what I'm working on.
I don't mind spending the time. Goodness knows, I've got it right now. Some days move like molasses poured over snow around here.
Easter Redbud Sour-Cream Coffee Cake with Western Redbud
I've been really sick lately. As in 'the herbs aren't doing it, I need a Doc' sort of sick. I was down and out (well, as much as a person that takes care of their mother could be) for 5 days. Yesterday, I was finally feeling good enough to actually start chomping at the bit to get outside.
It's been beautiful here. Well, in a drought stricken sort of way. Blue skies, light breezes, bees and flowers every where and not a drop of rain. I really needed to get out in it. But I didn't want to over do anything and end up back in bed. So I walked down past the orchard to get some Redbud blossoms.

Redbuds (Cercis occidentalis) are native here. They are a member of the huge legume family and I often use the seed pods in place of snow peas in recipes. And the flowers taste like a sweet pea. I always hear them described as 'sugar-sweet', but I can't get behind that.
I don't do a lot with them besides pickle them for later use and this coffee cake. But it's good and just in time for Easter brunch.
Sour Cream-Redbud Coffee Cake
Mix 2 cups Redbud blossoms, 1/2 cup sugar, zest from 2 lemons and let sit for 30 minutes.
In a separate bowl blend 1.5 cups flour, 2 teaspoons baking powder, 1/2 teaspoon baking soda, 1/2 teaspoon salt. Then add this dry mix to the flowers and fold.
Mix 1 beaten egg with 1/2 cup cream, one cup of sour cream, 2 tablespoons oil, add to the flower mixture.
Fold in 2 tablespoons chopped, candied ginger.
Pour into a greased loaf pan. Mix 1/2 cup flour, 1/4 cup brown sugar, 1/4 cup butter and 1/2 teaspoon cinnamon and sprinkle over the batter.
Bake at 375 for about 45 minutes (until the cake springs back when touched).
Cool slightly before removing from pan.

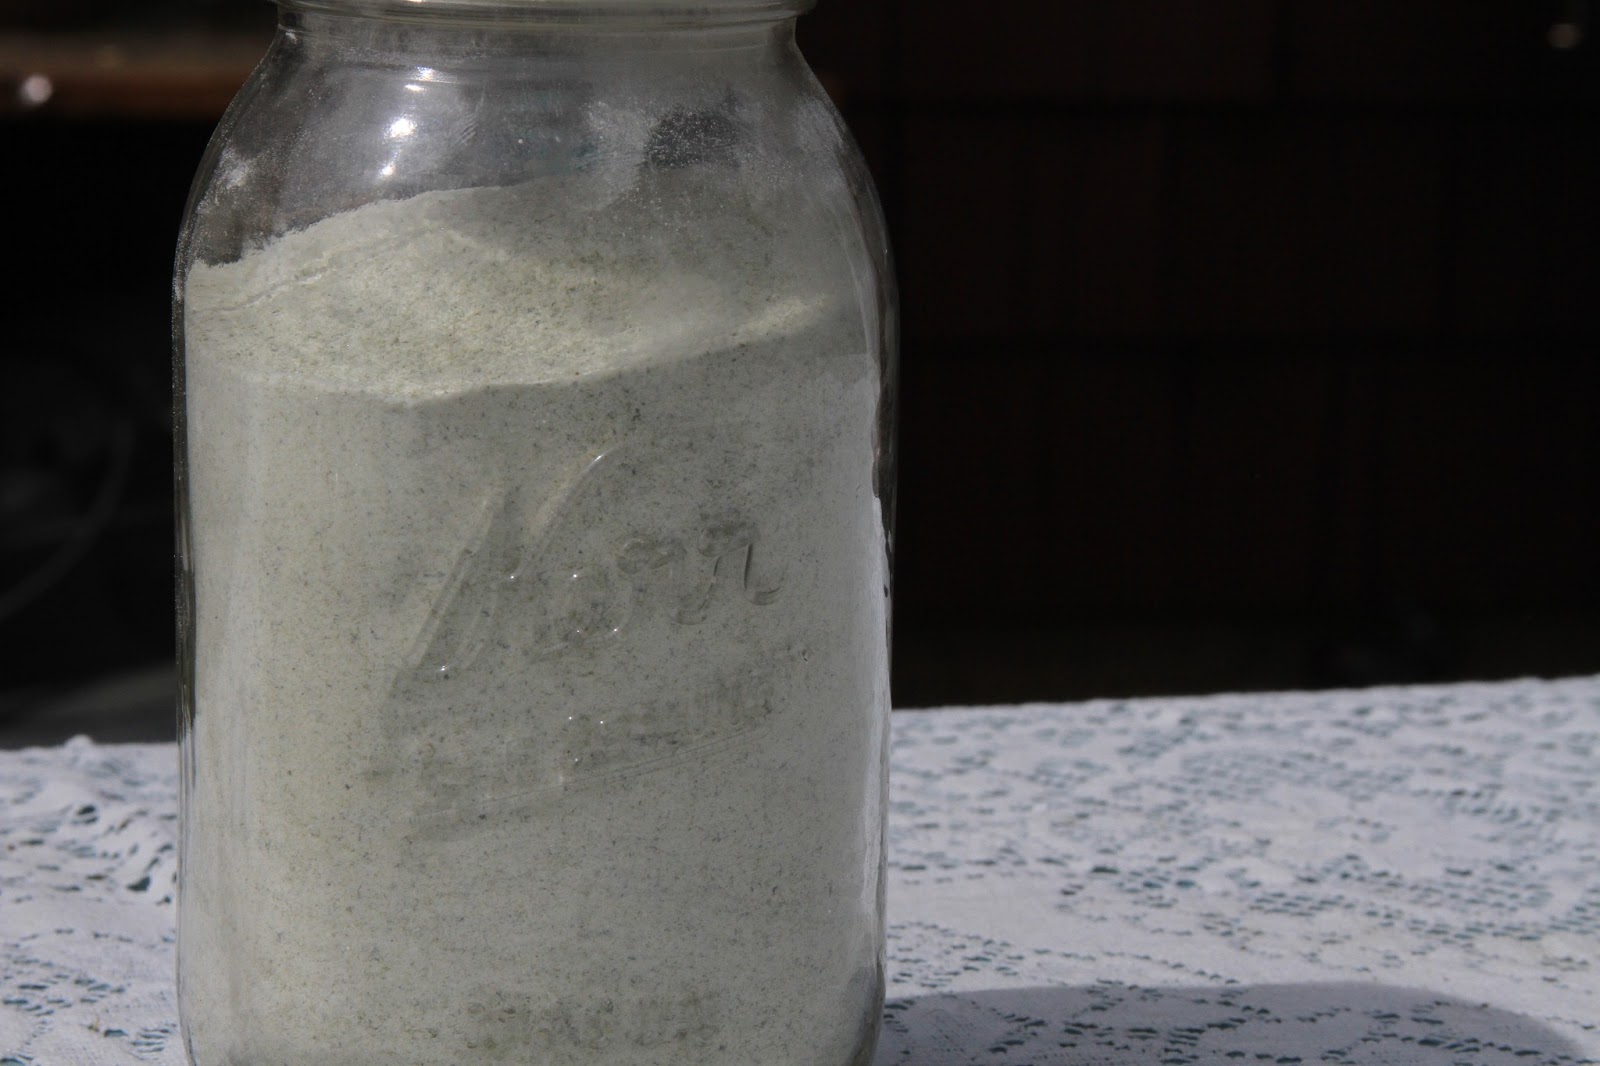
Pineapple Weed Sugar
I love pineapple weed. Almost every one I know loves pineapple weed. People that aren't foragers recognize it too. I always hear 'Oh, I've always wondered what that was!' when I point it out to students.

Pineapple weed (Matricaria discoidea) is a tough, beautiful little herb that seems to thrive in the worst soils. Dry dirt driveways, trail heads, well-worn footpaths, these are the places to seek pineapple weed. And you will be rewarded with a sweet fragrant plant that supplies an almost perfect cup of tea. Herbally, it's used the same way Chamomile is. I've often wondered if most of the 'medicine' that comes from a few herbal teas is simply from practicing stillness for a few moments, filling your head with steam as you sip and watching the world go by, just for a few minutes.
I've often tried to 'keep' the flavor of pineapple weed. Mostly I've been unsuccessful. The oils dissipate quickly when drying. Last year, I infused some of the herb in glycerin. It was good for things like cream cheese frosting, but really was too sweet to use for much else. This year though, I tried infusing sugar with it and the oils seem to be binding with the sugar. I am going to use this for glazes and baking.
Mix 1 cup of pineapple weed heads with one cup of sugar. Run through the blender in small batches. The sugar will get wet and lumpy from the crushed flower heads. Spread mix out on a baking sheet and dry. (It took about two days.) Occasionally, I broke the chunks up with a fork.

If you don't mind the lumps, you can use it as it is. Otherwise you can run it through a blender again.

It's a beautiful shade of green and smells so good!

Pineapple weed (Matricaria discoidea) is a tough, beautiful little herb that seems to thrive in the worst soils. Dry dirt driveways, trail heads, well-worn footpaths, these are the places to seek pineapple weed. And you will be rewarded with a sweet fragrant plant that supplies an almost perfect cup of tea. Herbally, it's used the same way Chamomile is. I've often wondered if most of the 'medicine' that comes from a few herbal teas is simply from practicing stillness for a few moments, filling your head with steam as you sip and watching the world go by, just for a few minutes.
I've often tried to 'keep' the flavor of pineapple weed. Mostly I've been unsuccessful. The oils dissipate quickly when drying. Last year, I infused some of the herb in glycerin. It was good for things like cream cheese frosting, but really was too sweet to use for much else. This year though, I tried infusing sugar with it and the oils seem to be binding with the sugar. I am going to use this for glazes and baking.
Mix 1 cup of pineapple weed heads with one cup of sugar. Run through the blender in small batches. The sugar will get wet and lumpy from the crushed flower heads. Spread mix out on a baking sheet and dry. (It took about two days.) Occasionally, I broke the chunks up with a fork.

If you don't mind the lumps, you can use it as it is. Otherwise you can run it through a blender again.
It's a beautiful shade of green and smells so good!
Sunday, March 24, 2013
Did You Ever Eat a Pine Tree?
I have always been fascinated by the idea of eating cambium.
When I was in the 4th grade, Mrs. Kokila read to about our local tribes of Native Americans. She read us books like 'Ishi in Two Worlds' and took us to museums to see Native American baskets and beads and cooking utensils. And some where along the line, someone mentioned eating acorns and cambium. I was hooked.
Eating cambium is nothing new.
But what do you do with it?
If you come to my classes, we harvested buckets full last year. We did the 'normal' things with it. Baked it. Fried it. Boiled it.
(yawn)
It was bland. It was boring. It was dull.
But then I read that the Finns used it as a flour.
Perfect.
I used Pinus sabiniana, harvested in February. We had a warm early spring and I was able to get some early. Otherwise, I would have waited another few weeks. P sabiniana (or Gray pine) is probably not the most flavorful of pine. In fact, there aren't many uses for any part of the Gray pine. It's so full of knots that you can't get a straight board out of it. It's messy and drips pitch all over whatever is under it. And every once in a while, it drops one of it's huge cones and takes out a car windshield. It does have a nice seed, but it's (cough.cough)...a tough nut to crack. But it's fast growing and I have tons of it. I'm trying to open up the meadow and increase the edges. So these are trees that are coming down any way. I don't recommend cutting down a slow growing, beautiful, useful pine just for the sake of eating it.
I ground up my cambium and started experimenting. I wanted to see how far I could take it. And this was extreme. I made junk food. Yep. Junk food. But yummy junk food.
Doughnuts.
I wish I could say that using cambium made these healthier, especially the fried ones. I would have an excuse to eat more of them. But alas, they probably not any healthier than doughnuts bought a really good doughnut shop. Tender on the outside Moist on the inside. A soft glaze that sticks to your fingers...but no taste of pine. Anywhere. Just pure, sweet doughnut. I did cut the sugar down on the baked version a bit, and baking cuts down a few of the calories.
Cambium doesn't have gluten, so you always have to add something to make it stick together. I used wheat flour and almond flour in these two recipes I added the almond flour in the baked version to cut down on the sugar and make them slightly healthier.
If you decide to work with cambium, my experiments showed I could take it to about a 50:50 ratio with flour. Your mileage may vary. I thought I could go higher actually, but I cannot bring one more doughnut into this house for a few months. Yes, I made that many batches and ate that many of them. I do not want to see another doughnut for a very long time.

Baked Cambium Donuts
These are the healthiest of the two. I cut down the sugar a little, with the addition of almond flour.
1/2 cup flour
1/2 cup pine cambium
3 heaping tablespoons almond flour
5 tablespoons sugar
1 teaspoon baking powder
1 tablespoon butter
1/4 teaspoon cinnamon
1/2 teaspoon vanilla
6 tablespoons milk
1 egg (beaten)
Preheat oven to 325 degrees. Grease a doughnut pan.
Scald milk and melt the butter in it.
In a large bowl, mix flours, sugar, baking powder, cinnamon and salt. Stir in eggs, vanilla and butter. Beat until blended.
Spoon batter into doughnut pan.
Bake 10-15 minutes, until doughnuts spring back when touched. Slightly cool before removing from pan.
I thought these were fine without glazing, but if you want to frost, glaze, sprinkle with powdered sugar, whatever, knock yourself out.
And now for the 'fat pills'...
Raised Cambium Doughnuts
1/2 cup warm water
2 pkg active dry yeast
3/4 cup milk
1/4 cup sugar plus 1 teaspoon for yeast
1 teaspoon salt
2 cups flour (plus extra for kneading)
2 cups cambium flour
1/3 cup shortening
2 eggs
Soak yeast in warm water, add the 1 teaspoon of sugar. In a small saucepan, add the shortening to the milk and scald. In a large bowl, mix sugar and salt together and then pour the scalded milk over. Stir until dissolved. Let cool until the mixture is warm. If too hat, your yeast will die.
Add 1 cup of flour, eggs and yeast mixture. Beat until smooth. Add remaining flours and mix. Dough will be very, very soft. Keep your hands floured to keep it from sticking. When dough begins to leave the sides of the bowl, turn out onto a lightly floured board. Knead until dough becomes smooth and elastic, working in extra flour if needed (I worked in about another half cup of flour to get a dough that had enough body to roll out.)
Place dough in a greased bowl, turn over so top is coated with oil. Cover with a towel and place in a warm spot until doubled (about an hour).

Roll out dough to 1/2 inch thickness and cut doughnuts out. (I used a doughnut cutter, but you could use a glass and a bottle cap, a 32 can and a small canape cutter, pill bottle, whatever works for you).
Let rise until very light (about 40 minutes.
Drop into hot fat (325-350 degrees) and turn when doughnuts are just barely brown. Turn once again when doughnuts are browned sufficiently.
Drain on absorbent paper. Glaze while still warm, or roll in sugar or cinnamon sugar.

Glaze
1 tablespoon water
1/2 teaspoon vanilla
1 cup confectioners sugar
Mix together, add a few more drops of water to thin if necessary.
When I was in the 4th grade, Mrs. Kokila read to about our local tribes of Native Americans. She read us books like 'Ishi in Two Worlds' and took us to museums to see Native American baskets and beads and cooking utensils. And some where along the line, someone mentioned eating acorns and cambium. I was hooked.
Eating cambium is nothing new.
But what do you do with it?
If you come to my classes, we harvested buckets full last year. We did the 'normal' things with it. Baked it. Fried it. Boiled it.
(yawn)
It was bland. It was boring. It was dull.
But then I read that the Finns used it as a flour.
Perfect.
I used Pinus sabiniana, harvested in February. We had a warm early spring and I was able to get some early. Otherwise, I would have waited another few weeks. P sabiniana (or Gray pine) is probably not the most flavorful of pine. In fact, there aren't many uses for any part of the Gray pine. It's so full of knots that you can't get a straight board out of it. It's messy and drips pitch all over whatever is under it. And every once in a while, it drops one of it's huge cones and takes out a car windshield. It does have a nice seed, but it's (cough.cough)...a tough nut to crack. But it's fast growing and I have tons of it. I'm trying to open up the meadow and increase the edges. So these are trees that are coming down any way. I don't recommend cutting down a slow growing, beautiful, useful pine just for the sake of eating it.
I ground up my cambium and started experimenting. I wanted to see how far I could take it. And this was extreme. I made junk food. Yep. Junk food. But yummy junk food.
Doughnuts.
I wish I could say that using cambium made these healthier, especially the fried ones. I would have an excuse to eat more of them. But alas, they probably not any healthier than doughnuts bought a really good doughnut shop. Tender on the outside Moist on the inside. A soft glaze that sticks to your fingers...but no taste of pine. Anywhere. Just pure, sweet doughnut. I did cut the sugar down on the baked version a bit, and baking cuts down a few of the calories.
Cambium doesn't have gluten, so you always have to add something to make it stick together. I used wheat flour and almond flour in these two recipes I added the almond flour in the baked version to cut down on the sugar and make them slightly healthier.
If you decide to work with cambium, my experiments showed I could take it to about a 50:50 ratio with flour. Your mileage may vary. I thought I could go higher actually, but I cannot bring one more doughnut into this house for a few months. Yes, I made that many batches and ate that many of them. I do not want to see another doughnut for a very long time.

Baked Cambium Donuts
These are the healthiest of the two. I cut down the sugar a little, with the addition of almond flour.
1/2 cup flour
1/2 cup pine cambium
3 heaping tablespoons almond flour
5 tablespoons sugar
1 teaspoon baking powder
1 tablespoon butter
1/4 teaspoon cinnamon
1/2 teaspoon vanilla
6 tablespoons milk
1 egg (beaten)
Preheat oven to 325 degrees. Grease a doughnut pan.
Scald milk and melt the butter in it.
In a large bowl, mix flours, sugar, baking powder, cinnamon and salt. Stir in eggs, vanilla and butter. Beat until blended.
Spoon batter into doughnut pan.
Bake 10-15 minutes, until doughnuts spring back when touched. Slightly cool before removing from pan.
I thought these were fine without glazing, but if you want to frost, glaze, sprinkle with powdered sugar, whatever, knock yourself out.
And now for the 'fat pills'...
Raised Cambium Doughnuts
1/2 cup warm water
2 pkg active dry yeast
3/4 cup milk
1/4 cup sugar plus 1 teaspoon for yeast
1 teaspoon salt
2 cups flour (plus extra for kneading)
2 cups cambium flour
1/3 cup shortening
2 eggs
Soak yeast in warm water, add the 1 teaspoon of sugar. In a small saucepan, add the shortening to the milk and scald. In a large bowl, mix sugar and salt together and then pour the scalded milk over. Stir until dissolved. Let cool until the mixture is warm. If too hat, your yeast will die.
Add 1 cup of flour, eggs and yeast mixture. Beat until smooth. Add remaining flours and mix. Dough will be very, very soft. Keep your hands floured to keep it from sticking. When dough begins to leave the sides of the bowl, turn out onto a lightly floured board. Knead until dough becomes smooth and elastic, working in extra flour if needed (I worked in about another half cup of flour to get a dough that had enough body to roll out.)
Place dough in a greased bowl, turn over so top is coated with oil. Cover with a towel and place in a warm spot until doubled (about an hour).

Roll out dough to 1/2 inch thickness and cut doughnuts out. (I used a doughnut cutter, but you could use a glass and a bottle cap, a 32 can and a small canape cutter, pill bottle, whatever works for you).
Let rise until very light (about 40 minutes.
Drop into hot fat (325-350 degrees) and turn when doughnuts are just barely brown. Turn once again when doughnuts are browned sufficiently.
Drain on absorbent paper. Glaze while still warm, or roll in sugar or cinnamon sugar.
Glaze
1 tablespoon water
1/2 teaspoon vanilla
1 cup confectioners sugar
Mix together, add a few more drops of water to thin if necessary.
Subscribe to:
Posts (Atom)