I've been taking Wordpress for a test drive and so far I'm liking the format. I'm playing with one of the free themes over there, trying to decide which one fits my needs best before I purchase. If you'd like to leave feedback about what you see, please do, I'd appreciate it.
You can see my latest two blogs over there. The address is:
wildness.me
Monday, May 13, 2013
Wednesday, May 8, 2013
Pickled Green Almonds and Salted Green Almonds

For the most part, I like growing nut trees. They're easy to care for and pretty do what they are supposed to do without much help from me. They aren't 'foraged food', but there is a certain aspect of 'vintage food' in them. Fortunately, I have several sweet almond trees in my yard. Unfortunately, I've never eaten a ripe almond from them. Why? Squirrels. By the time the almonds are ripe, there aren't any left.
The almond trees are located farther away from the house from my other nut trees. Farther away from the dogs normal patrol route. So the squirrels steal with impunity. They will clean out my tree, and do a better job than any mechanical harvester can do. When I walked near the tree, a squirrel would sit in the branches, a green nut clamped in his paws and bark at me.
And even though I routinely remove squirrels from the population, within a day or two, another replacement moves in to take over the territory.
I was talking to a neighbor early one spring, and he surprised me by reaching up and picking a fuzzy green almond and popping it into his mouth. When I expressed a 'blink-blink' reaction, he told me that in his culture (he's Palestinian), green almonds are a treat.
So, I tried one. It was crunchy and fuzzy and bland. The drupe inside (what grows up to be what we call the 'nut') hadn't formed yet and there was a sort of clear jelly in it's place. It was not unpleasant, but at the same time it wasn't entirely pleasant, either. 'Salt', my neighbor said, 'They are better with salt'. So I ran up to the house and brought a shaker of sea salt back to the tree. Frankly, I didn't think the salt made much difference. It was still just a crunchy, fuzzy green thing. I suppose it's one of those things that you just have to be raised with to appreciate.
I was disappointed because I hoped to find something to do with my almonds prior to their being devoured by the squirrels.
Then I noticed everyone doing things with unripe black walnuts. Pascal pickles green black walnuts and Hank makes nocino (a liqueur made from the unripe walnuts), and I wondered 'What can I do the with green almonds?'
My first experiment pickling them, didn't go well. I soaked them same way green walnuts are soaked for a couple of weeks. It just didn't work. I suppose because the green almonds don't have the load of tannins that the walnuts do.
So then I just pickled them like I would any vegetable. I tried a batch with sweet spices (rice vinegar, cinnamon, cloves and the like) and a more savory blend (white vinegar, chilis, bay and garlic). Both were a hit. The fuzz disappears, the crunch gets a bit softer. They pair nicely with a good cheese and a cracker or in an antipasto.
You lose, Squirrels.
Saturday, May 4, 2013
Elderflower Panna Cotta with a Wild Blackberry Gelee
.jpg)
Panna Cotta was originally made with cream fresh from someone's cow. It's difficult to find fresh, unpasteurized cream any more due to (cough-cough) health concerns.
If you don't have access to a cow or it's cream, I've included the modernized recipe to make it easier. Even though you have to do a few extra steps to make it's creamy goodness, it's still easy and worth every minute.
Start by preparing your 3 serving dishes. Panna Cotta can be served in just about any sort of a bowl that you like, I used martini glasses just to show off the layers. (Seriously. I wouldn't serve them to my family like this. I have big dogs and dinner time can be precarious. I once dropped a coconut cream pie to the floor. There is no 5 second rule in this house. All 4 dogs were on it in a heartbeat scarfing and growling and slobbering. For weeks after they skulked about the table, hoping another pie would miraculously appear on the floor. Alas. It hasn't. However, say the dogs, eternal vigilance is the price of a pie.)
Ingredients
1 3/4 cups heavy cream
2 tablesppons sugar
3 tablespoons Elderflower cordial
1/2 cup fresh or frozen berries
1 to 2 envelopes powdered gelatin
Place a 1/4 cup cream in a bowl and sprinkle with 1 and a half teaspoons of powdered gelatin. Let gelatin soften for 5 or 10 minutes.
Place the other 1.5 cups of cream in a saucepan. Whisk in 2 tablespoons of sugar and 3 tablespoons of elderflower cordial. Place on stove and bring to a simmer. Continue to whisk while adding gelatin mixture. When the cream begins to simmer again, remove from heat and divide evenly into your serving bowls, martini glasses, whatever.
Place in the refrigerator to let it firm up, while preparing the second layer.
Measure 1/4 cup of water into a bowl and sprinkle 1 teaspoon of gelatin over it. (You can 'fudge on the amount of gelatin that you use here. I like it a little softer, so I use less gelatin. You may like it a little harder. It's totally up to you.) Let the gelatin soften for 5 or 10 minutes. Place 3/4 cup of water in a saucepan, add 2 tablespoons of sugar and a 1/2 cup berries. Add the gelatin mixture, stirring constantly and let the mixture come to a simmer. Remove from heat. Pour the berry mix into a heatproof liquid measuring cup and let it sit until it comes to room temperature. This step important, because if the mixture is too hot, it will melt the layer of panna cotta underneath and you'll end up with a muddy mess.
When the berry mixture is cooled to room temperature, carefully pour in equal amounts over the panna cotta layers. Then refrigerate for an hour for gelatin to set.
Hard Manzaita Cider!
Hard apple cider (HAC) begins with a simple starter that is made from an apple and apple juice. That's it. It's one of the easiest things to do in the kitchen.
I've been using that starter in a lot of things such as the pineapple chicha from an earlier blog. For a lot of my fermented recipes, it's taking the place of salt and whey. And it made this foray into hard manzanita cider really simple.
Manzanita berries:
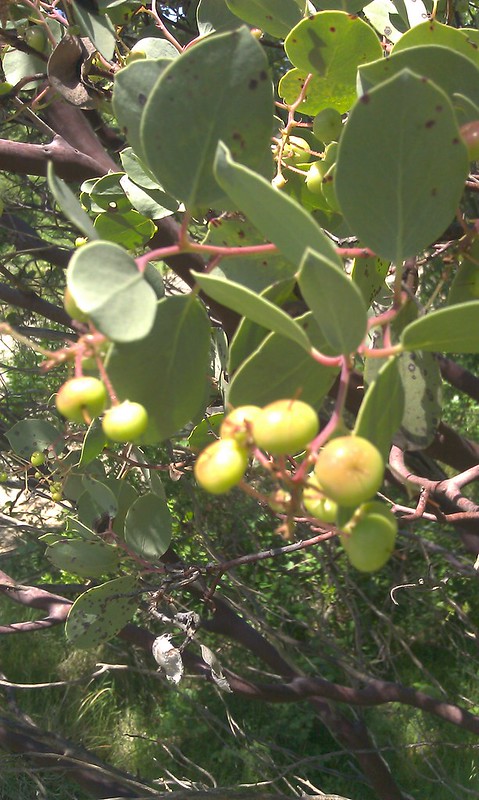
I've made mancanita cider before (using Hank Shaw's recipe: http://honest-food.net/2010/08/22/manzanita-cider/) so I started with that, tweaking it slightly.
Mixe 2 cups of sugar with 10 cups of water, bring it to a boil and pour it over 4 cups of cleaned manzanita berries. Let it sit about 20 minutes and mash it up with a potato masher. No need to kill yourself mashing on this step. The idea is just to crack open most of the berries so that they can infuse more efficiently. Let it the mess sit overnight and then strain it.
Pour your cider into a carboy and add 1 cup of the HAC starter. (See the blog on Hard Apple Cider for directions. Remember the starter needs to made several days in advance of using it, so that it's all filled with bubbly goodness).
Slip on an airlock, or a balloon or whatever set up you use and leave it alone for a few days. # days if you like it sweet. Longer if you like it drier and with a little more alcohol to it.
When it's reached the flavor that you like, bottle, leave it alone for a day or two, then refrigerate it for about a week.
A really easy treat for some hot afternoon.
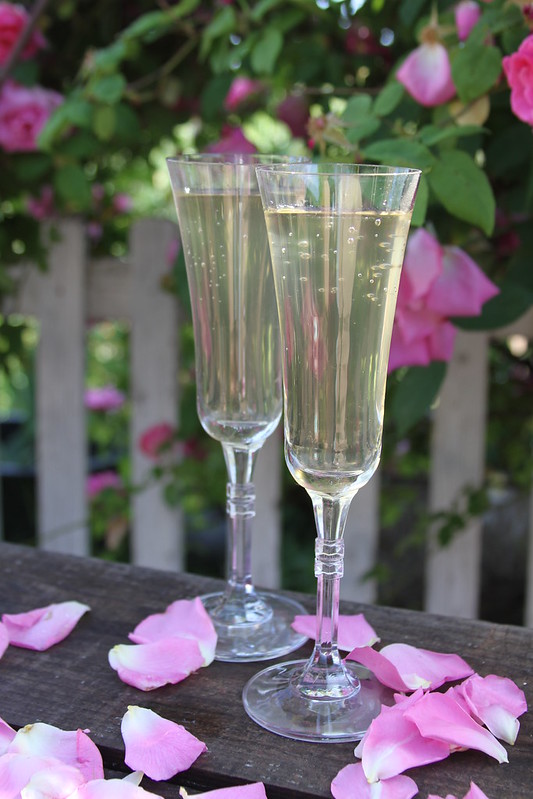
Elderflower Cordial. Not Lemon Syrup with Elderflower Undertones.

I've made elderflower cordial for a couple of years now and every year that I make it, I think 'I should have just made lemon syrup and saved myself a lot of time and trouble'.
I've tasted commercially produced cordials from Europe and they don't seem to be nearly as 'lemony' as the stuff we make at home here. The commercially prepared cordial tastes like elderflower with a bit of lemon for tartness. Yes, it does have some 'artificial flavors along with the natural ones, but it tastes a lot better than the 'lemon with floral undertones cordial' that the internet recipes produce.
Almost every recipe that I've seen calls for 3 or 4 whole lemons. That's a lot of lemon. Most recipes also call for boiling the flowers, or at the very least, using boiling water. The floral properties of the elderflower seem so fragile and delicate, that it I think that they're easily destroyed by heat. Flowers that are sweet and fragrant going in to the 'dunk' don't seem to transfer their lovely properties to the hot syrup and the overpowering lemons become prominent Of course, you need a little tartness to balance the saccharine sweetness of the syrup, but we're after a balance here, not a lemon syrup with a few floral undertones.

If you didn't read my earlier blog about how to handle fresh elderflowers, here's a recap:
-Pick elderflowers that are more cream-colored and less green-colored. You'll be able to compare the flowers on the tree to understand this. The greener flowers have unopened buds and won't add flavor.
-Make sure the flowers aren't dropping off the coymb. If they are, that head of flowers is too old. Leave them to produce berries for later use.
-Don't pick the flowers, put them in your pack, and continue on a few hour hike. The flowers will develop an unpleasant odor. Bring them home and refrigerate them.
-Don't rinse the flowers prior to using them. You'll wash away a lot of the delicate pollen which is where a lot of flavor comes from. Just shake them gently to get the bugs out. You'll find other bugs as you process the flowers and be able to remove them then, too.
-Remove all the green stems. Don't worry about the tiny white pedicles that hold the flowers on the stem. Yes, I know that seems like a big chore, but once you get the technique down (hold the blooms between your middle finger and forefinger and snip-snip-snip with the scissors) it goes pretty quickly. If you leave many green stems on, they add a 'rank' flavor to whatever your making. Besides, everthing on an elder other than the blooms and the berries are toxic.
-When you've cleaned out your bag, you may find quite a bit of pollen sticking to it's sides and bottom. Be sure to add that to whatever it is that you're cooking. The pollen adds flavor and is responsible for a lot of the sunshine color in your cordial.
For the cordial:
Use between 20 and 30 flower heads. Flower heads vary in size of course, so just use your judgement. You want to leave plenty of blooms for berry production, so take your blooms from several trees.
Make about 8 cups of simple syrup (1:1) and let it cool to about 100 degrees.
Pour it over the prepared flowers (see above).
Add 2 tablespoons of lemon juice. If you like, add a bit of lemon rind, but don't go overboard. Actually, you caould add all kind sof citrus instead of lemons. Try blood orange. Try limes. Try a Meyer lemon.

Add 2 teaspoons of citric acid. (Both the citric acid and the lemon juice helps to balance out the flavor of the cordial and the citric acid also acts as an anti oxidant to help preserve the color and as a natural preservative.
Cover and let macerate for 2 days.
Strain.

At this point the cordial is perfectly good to bottle. But I wanted to 'amp' up the elderflower flavor, so I did a sort of 'double-infusion', which sounds more complicated than it is. I gathered another 20 heads of elderflower, prepared them, added them to the syrup that I just strained and let them sit for another two day. If you wanted to add the tiniest bit of vanilla bean here, it would be a good time.

After sitting for two days, strain again and bottle.
This should keep about 4 months in the refrigerator If you wanted to reheat the strained cordial and then water-bath can for a longer shelf life, note that you will lose a bit of the beautiful color and scent. But it will still taste darn good. And not over-lemony.
The jar on the right has been through a water-bath. You can see that the heat has altered the color slightly.

Thursday, May 2, 2013
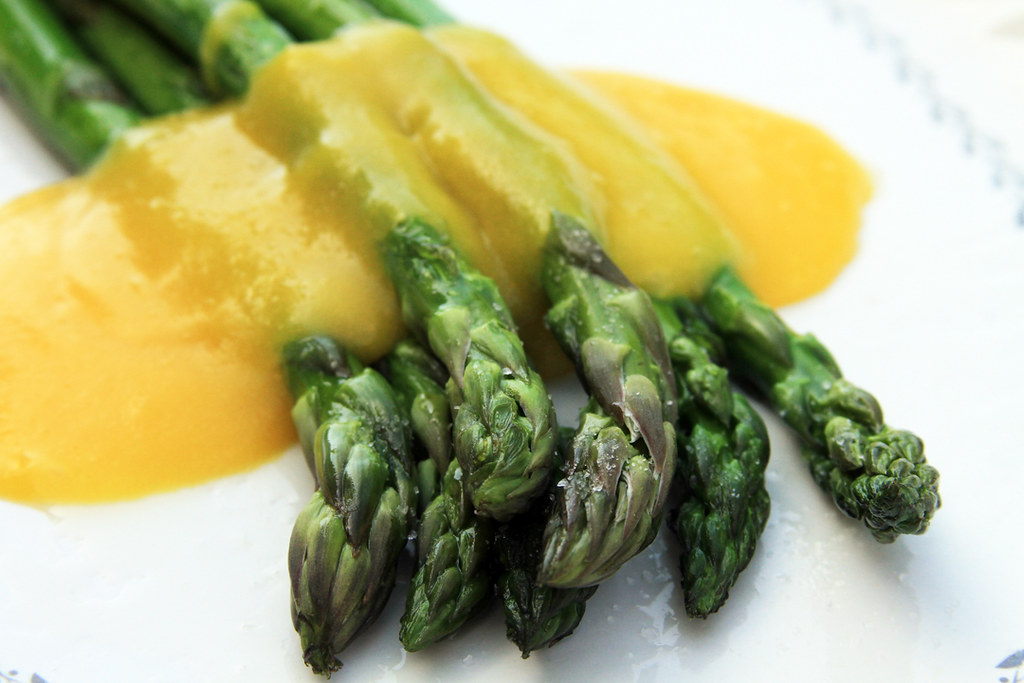
Asparagus with Elderflower Hollandaise
It's mid-spring here, but it's been hot and dry already. There is strength in the green grass yet, but shortly the emerald hills will change to the color of ginger and the constant worry of fire will be here. For now, I sleep with the windows open and relish the nightly delta breeze tickling my back. I try to engrave the feeling in my mind so that I can call it back up when the temperature rises to 110 degrees.
I'm making the most of what I consider 'spring foods' because they aren't going to last long once the sun rises a little higher in the sky.
Elderflower is on, perhaps a little bit early this year. It's abundant in this area which is a good thing, because I enjoy it's delicate floral essence and try to use it often.
Asparagus is abundant too, Asparagus always brings memories of my mother piling it on my plate and admonishing me: 'Asparagus is Jackie Kennedy's favorite vegetable'. Ok, Mom. But don't even come near me with a pillbox hat.
I wanted a way to mix those early spring flavors and naturally my thoughts turned toward Hollandaise and using the sauce to anchor the two foods.
Elderflower is wonderful to work with, but it takes care:
-Pick flowers that are more cream-colored and less green. The green ones have too many unopened buds to add any flavor.
-Make sure that the flowers aren't dropping off the corymbs as you pick it. If they are, it means those particular flowers are too old. Leave them to produce berries.
-Don't pick the flowers and then leave them in your pack for a few hours while you finish you're hike. Bring them home and refrigerate the blooms immediately.
-Don't rinse the flowers prior to using them. You'll wash away a lot of the delicate pollen which is where a lot of flavor comes from. Just shake them gently to get any bugs out. You'll find others as you work the flowers and you can remove them then.
-Remove all the green stems. Don't worry about the tiny white pedicles that hold the flowers, Yes, I know that seems like a chore, but once you get the technique down (sort of hold the blooms between you'r forefinger and middle finger and going snip-snip-snip with the scissors). If you leave the green stems on , they'll add a rank flavor to whatever you're making. Besides, any parts of the elder, other than the flowers and berries are considered toxic.
-When you've cleaned out your bag, you may find quite a bit of pollen clinging to the sides. Add it to whatever you're cooking to increase the 'elderflower' flavor.
As far as a recipe, if you have a favorite Hollandaise recipe, just use that. Simply gently poach a handful or two of cleaned elderflowers in the butter for a few minutes on very low heat. You can sieve out the flowers or not, your choice.
If you don't have a favorite recipe, here's mine:
Simmer 2 handfuls of elderflower (as described above) in 1/2 cup of unsweetened butter.
Whisk 4 egg yolks and a squeeze of fresh lemon juice together in a glass or stainless steel bowl (note that you'll be using this as a double boiler, so make sure it fits in another saucepan), until doubled in volume.
Place the bowl in a pot of simmering water (or use a double boiler if you have one), and continue to whisk the egg mixture constantly. If you let the mixture get too hot, you'll end up with scrambled eggs.
While still whisking, slowly add the infused butter. Whisk until mixture is doubled in volume and then remove from heat.
Whisk in a pinch of salt and cayenne pepper.
You can serve it over asparagus (or on the side) or as Eggs Benedict for a fancy brunch.
Subscribe to:
Posts (Atom)