Right now, manzanita berries are ripe. I wanted to make a hard cider out of them and with out more than one try I ended up with a light, refreshing hard manzanita cider with an alcohol content of about 3.0. Not many of my kitchen experiments go all that easy and turn out this goo on the first try, and I have to chalk it up to the hard apple cider that I wrote about in an earlier blog.
Hard apple cider (HAC) begins with a simple starter that is made from an apple and apple juice. That's it. It's one of the easiest things to do in the kitchen.
I've been using that starter in a lot of things such as the pineapple chicha from an earlier blog. For a lot of my fermented recipes, it's taking the place of salt and whey. And it made this foray into hard manzanita cider really simple.
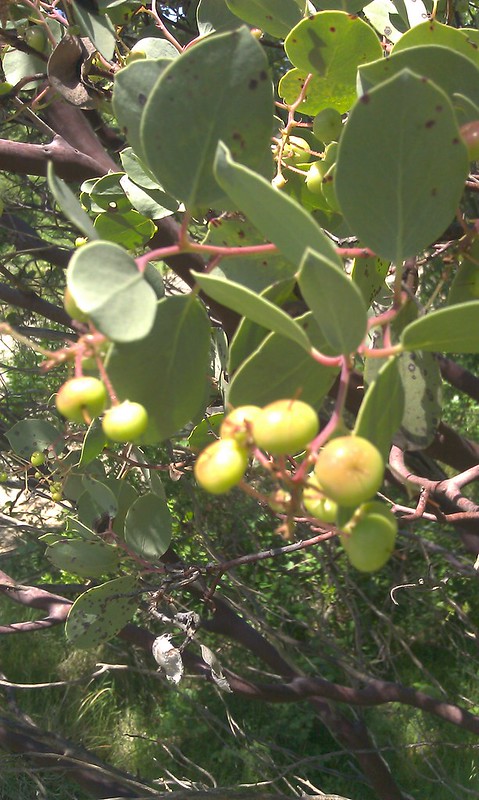
Manzanita berries:
I've made mancanita cider before (using Hank Shaw's recipe: http://honest-food.net/2010/08/22/manzanita-cider/) so I started with that, tweaking it slightly.
Mixe 2 cups of sugar with 10 cups of water, bring it to a boil and pour it over 4 cups of cleaned manzanita berries. Let it sit about 20 minutes and mash it up with a potato masher. No need to kill yourself mashing on this step. The idea is just to crack open most of the berries so that they can infuse more efficiently. Let it the mess sit overnight and then strain it.
Pour your cider into a carboy and add 1 cup of the HAC starter. (See the blog on Hard Apple Cider for directions. Remember the starter needs to made several days in advance of using it, so that it's all filled with bubbly goodness).
Slip on an airlock, or a balloon or whatever set up you use and leave it alone for a few days. # days if you like it sweet. Longer if you like it drier and with a little more alcohol to it.
When it's reached the flavor that you like, bottle, leave it alone for a day or two, then refrigerate it for about a week.
A really easy treat for some hot afternoon.
Showing posts with label wild. Show all posts
Saturday, May 4, 2013
Thursday, May 2, 2013
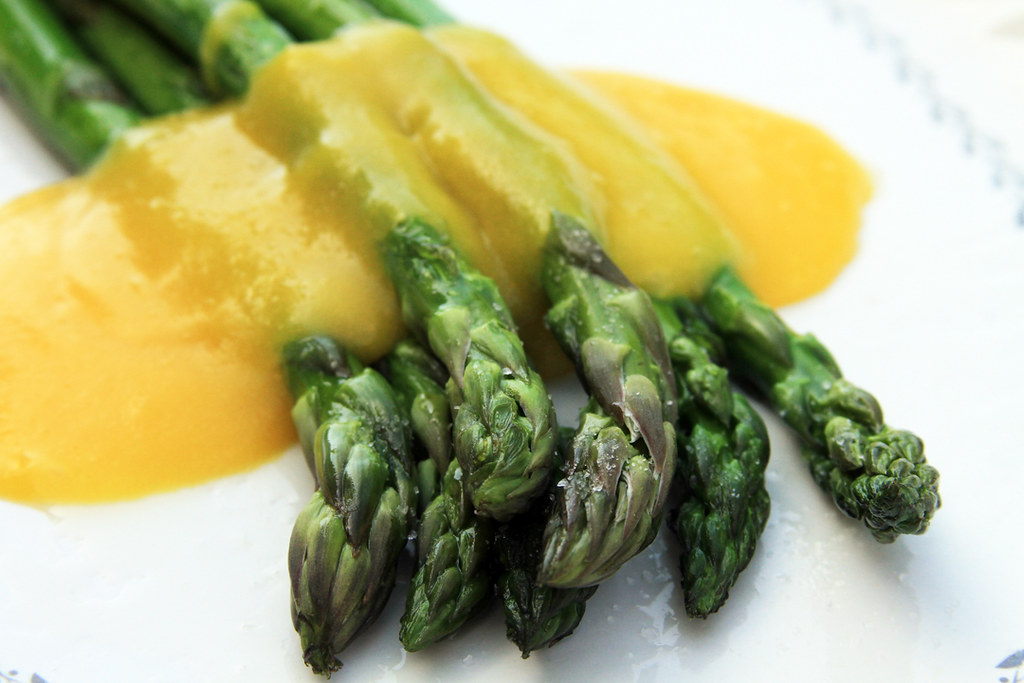
Asparagus with Elderflower Hollandaise
It's mid-spring here, but it's been hot and dry already. There is strength in the green grass yet, but shortly the emerald hills will change to the color of ginger and the constant worry of fire will be here. For now, I sleep with the windows open and relish the nightly delta breeze tickling my back. I try to engrave the feeling in my mind so that I can call it back up when the temperature rises to 110 degrees.
I'm making the most of what I consider 'spring foods' because they aren't going to last long once the sun rises a little higher in the sky.
Elderflower is on, perhaps a little bit early this year. It's abundant in this area which is a good thing, because I enjoy it's delicate floral essence and try to use it often.
Asparagus is abundant too, Asparagus always brings memories of my mother piling it on my plate and admonishing me: 'Asparagus is Jackie Kennedy's favorite vegetable'. Ok, Mom. But don't even come near me with a pillbox hat.
I wanted a way to mix those early spring flavors and naturally my thoughts turned toward Hollandaise and using the sauce to anchor the two foods.
Elderflower is wonderful to work with, but it takes care:
-Pick flowers that are more cream-colored and less green. The green ones have too many unopened buds to add any flavor.
-Make sure that the flowers aren't dropping off the corymbs as you pick it. If they are, it means those particular flowers are too old. Leave them to produce berries.
-Don't pick the flowers and then leave them in your pack for a few hours while you finish you're hike. Bring them home and refrigerate the blooms immediately.
-Don't rinse the flowers prior to using them. You'll wash away a lot of the delicate pollen which is where a lot of flavor comes from. Just shake them gently to get any bugs out. You'll find others as you work the flowers and you can remove them then.
-Remove all the green stems. Don't worry about the tiny white pedicles that hold the flowers, Yes, I know that seems like a chore, but once you get the technique down (sort of hold the blooms between you'r forefinger and middle finger and going snip-snip-snip with the scissors). If you leave the green stems on , they'll add a rank flavor to whatever you're making. Besides, any parts of the elder, other than the flowers and berries are considered toxic.
-When you've cleaned out your bag, you may find quite a bit of pollen clinging to the sides. Add it to whatever you're cooking to increase the 'elderflower' flavor.
As far as a recipe, if you have a favorite Hollandaise recipe, just use that. Simply gently poach a handful or two of cleaned elderflowers in the butter for a few minutes on very low heat. You can sieve out the flowers or not, your choice.
If you don't have a favorite recipe, here's mine:
Simmer 2 handfuls of elderflower (as described above) in 1/2 cup of unsweetened butter.
Whisk 4 egg yolks and a squeeze of fresh lemon juice together in a glass or stainless steel bowl (note that you'll be using this as a double boiler, so make sure it fits in another saucepan), until doubled in volume.
Place the bowl in a pot of simmering water (or use a double boiler if you have one), and continue to whisk the egg mixture constantly. If you let the mixture get too hot, you'll end up with scrambled eggs.
While still whisking, slowly add the infused butter. Whisk until mixture is doubled in volume and then remove from heat.
Whisk in a pinch of salt and cayenne pepper.
You can serve it over asparagus (or on the side) or as Eggs Benedict for a fancy brunch.
Labels:
asparagus,
cooking,
elder,
elderflower,
hollandaise,
recipe,
spring,
wild
Sunday, August 5, 2012
Wild Tea
I have a problem with some herbal teas.
They just don't have much flavor. I have to mix them with other more flavorful teas to really enjoy them.
See, the art of having a cup of tea is therapy in itself. It's calming. It's relaxing. It lets you stop for a moment and think. Often it is at these relaxed times that great ideas wander into my brain, exactly when I am not thinking about them.
But it's hard to have a good 'cuppa' when the tea has little color and even less flavor. What's the point?
I have never satisfactorily solved this problem, until now.
Years ago, I was reading Euell Gibbons and he mentioned accidently fermenting a pitcher of mint tea. It was that fermentation process that changed the tea from a barely noticeable mint flavor to a 'wowie-zowie' flavor. I tried it a couple of times, but have never been able to actually drink the result. I just couldn't get over the idea of drinking water that leaves were rotting in.
Move ahead to a few months ago, when reading Henriette K. new book and she mentions that she ferments the leaves only.
Hmmmmm.
Real tea is made from the leaves of Camelia sinensis plant. Green tea is unfermented leaves, Oolong tea is made from leaves that have been fermented a short time and black tea are leaves that are fully fermented.
I tried Henriette's method which involves bruising the leaves, placing them in a jar with the lid loosely attached and held at 118 degrees for 24 hours on top of the dehydrator. I used blackberry leaves.
Henriette's recipe gives a tea with more color than plain unfermented leaves, but the flavor was still bland. I just wasn't satisfied. I wanted a dark, rich cup of tea.
I used my handy-dandy pasta machine (that I got for a buck at a garage sale), cut the blackberry leaves into long, thin strands with the 'cutting' side, then put the leaves through the 'roller' side (twice) to bruise them. I filled a mason jar about half full (leave room for shaking), screwed the cap on tight and put them in my dehydrator. (OK, confession time. My 'dehydrator' is a broken down 1985 Jeep Cherokee that's been sitting in the front yard for years. I outfitted it with solar fans for air movement. OK. Now my red-necked secret is out.) I put the jar under a seat, out of direct sun. I shook the jar twice each day to redistribute the moisture from the juices. I didn't want the moisture to pool up on the glass and mold. After three days, I removed the leaves and dried them as usual.
And here's the final results. The top cup of tea is simply dried blackberry tea. The second brew is more like an oolong tea, of medium body and color. This tea was fermented 24 hours. The bottom cup is a full 3-day ferment, and loaded with a beautiful color and flavor.
Alas, the technique doesn't work for all teas. It didn't seem to make a difference with sage or Tulsi basil. But pretty much anything in the rose and mint families will have make a delightful, delicious cup of tea. Actually, people that normally don't like herbal teas are comfortable with this one because it has the appearance and taste of traditional teas.
My next step will be to try smoking (in a smoker, like a ham, not like a cigarette), because I've had smoked teas made from C. sinensis, and they are wonderful. And there is another type of tea called Pu'er that undergoes a double fermentation process. Might have to give that one a go, as well. (In my spare time of course. I think I can use those 10 minutes that I normally reserve for brushing my teeth...)
They just don't have much flavor. I have to mix them with other more flavorful teas to really enjoy them.
See, the art of having a cup of tea is therapy in itself. It's calming. It's relaxing. It lets you stop for a moment and think. Often it is at these relaxed times that great ideas wander into my brain, exactly when I am not thinking about them.
But it's hard to have a good 'cuppa' when the tea has little color and even less flavor. What's the point?
I have never satisfactorily solved this problem, until now.
Years ago, I was reading Euell Gibbons and he mentioned accidently fermenting a pitcher of mint tea. It was that fermentation process that changed the tea from a barely noticeable mint flavor to a 'wowie-zowie' flavor. I tried it a couple of times, but have never been able to actually drink the result. I just couldn't get over the idea of drinking water that leaves were rotting in.
Move ahead to a few months ago, when reading Henriette K. new book and she mentions that she ferments the leaves only.
Hmmmmm.
Real tea is made from the leaves of Camelia sinensis plant. Green tea is unfermented leaves, Oolong tea is made from leaves that have been fermented a short time and black tea are leaves that are fully fermented.
I tried Henriette's method which involves bruising the leaves, placing them in a jar with the lid loosely attached and held at 118 degrees for 24 hours on top of the dehydrator. I used blackberry leaves.
Henriette's recipe gives a tea with more color than plain unfermented leaves, but the flavor was still bland. I just wasn't satisfied. I wanted a dark, rich cup of tea.
I used my handy-dandy pasta machine (that I got for a buck at a garage sale), cut the blackberry leaves into long, thin strands with the 'cutting' side, then put the leaves through the 'roller' side (twice) to bruise them. I filled a mason jar about half full (leave room for shaking), screwed the cap on tight and put them in my dehydrator. (OK, confession time. My 'dehydrator' is a broken down 1985 Jeep Cherokee that's been sitting in the front yard for years. I outfitted it with solar fans for air movement. OK. Now my red-necked secret is out.) I put the jar under a seat, out of direct sun. I shook the jar twice each day to redistribute the moisture from the juices. I didn't want the moisture to pool up on the glass and mold. After three days, I removed the leaves and dried them as usual.
And here's the final results. The top cup of tea is simply dried blackberry tea. The second brew is more like an oolong tea, of medium body and color. This tea was fermented 24 hours. The bottom cup is a full 3-day ferment, and loaded with a beautiful color and flavor.
Alas, the technique doesn't work for all teas. It didn't seem to make a difference with sage or Tulsi basil. But pretty much anything in the rose and mint families will have make a delightful, delicious cup of tea. Actually, people that normally don't like herbal teas are comfortable with this one because it has the appearance and taste of traditional teas.
My next step will be to try smoking (in a smoker, like a ham, not like a cigarette), because I've had smoked teas made from C. sinensis, and they are wonderful. And there is another type of tea called Pu'er that undergoes a double fermentation process. Might have to give that one a go, as well. (In my spare time of course. I think I can use those 10 minutes that I normally reserve for brushing my teeth...)
Labels:
black tea,
blackberry,
fermentation,
foraging,
green tea,
oolong,
recipe,
tea,
wild
Thursday, April 12, 2012
Rain, Cucumbers and Loofahs
It's been wet here. Really wet. This is Northern California. It's not supposed to be this wet. I thought the spring was going to be a dry one and I've stopped stacking wood, I've changed into the summer curtains and dang it! I can't get into the woods or the garden. I was ready for some sunshine! But ok. When life gives you lemons... make lemonade.
Well, actually, I made a pot scrubber.
We have a plant called 'wild cucumber' around here. Actually we have at least two species of Marah growing. I've always thought it was such a pretty and interesting vine. There's something about it's lushness and it's beautiful greenness that screams 'fairy grove' to me. It seems like it has a bit of magic.
Wild cucumber grows in really dry places usually. I find it out on abandoned fences, in old orchards and crawling up grey pines. It's got this cool, spiny fruit, which is poisonous, actually.
I spied it driving it up my driveway. I had heard that you could make a nice loofah out of it, but I didn't know how. I had planned to wait to try it this fall, when the spiky fruit had turned brown, but with all this rain, I needed a project...
So I plucked that thorny little apple.
And it was thorny! Really thorny. I was wishing I had worn gloves. And I had no idea how I was going to peel it.
So I plopped it in a pot and boiled it for 2 hours.
And guess what? It was still thorny.
So I boiled it for another hour. And still, I needed to don gloves to peel it. I was rewarded with a few large and beautiful seeds and a very slimy out covering that still managed somehow to be 'poky'.
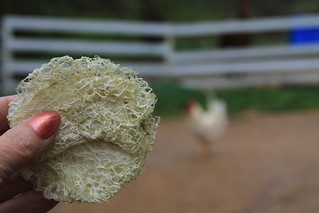
But underneath was this beautiful cellulose structure, just exactly like is found in the loofah gourd!
Now honestly, it's just a tad harsh to use on my skin. It's really going on 'Brillo Pad' harshness. But it is perfect for scrubbing pots and pans.
I'm satisfied.
The house is warm from boiling the cuke for three hours, I was distracted from the rain and I have a nifty pot scrubber. And I got to use a fairy plant. Not a bad day on the farm.
Thursday, January 14, 2010
Cattail Pasta, Great with Lentil Lasagna or any sauce...
I’ve been seeing Euell Gibbons mentioned a lot lately. He really was a pioneer. No, he didn't 'invent' eating wild, but he did publish and 'live the life' and took a lot of heat for it. I remember back about 30 years ago, reading his books for the first time. I was mesmerized. It was the first time that I felt someone else understood my some of my interests. How to make food from the wild that tasted good and had appeal. I was young and very poor and ‘free’ food was a necessity. I remember the ‘knitting needles’ left on the plate after eating cattails. (lol) You needed a lot of butter!
So, in a salute to old Mr. Gibbons, here is my recipe for cattail pasta. I especially like it in a lentil lasagna, but it’s equally good with your favorite sauce. If you already have a favorite pasta recipe, try cutting the flour in half and adding cattail pollen. You may have to experiment to find the best ratio, but it’s worth it.
Pasta is easy to make and economical. If you have a pasta cutter, good on you, but I just cut mine into shapes using a knife.
To make one pound of pasta, you need 1 cups of unbleached flour, 1 cup of cattail pollen 3 large eggs, and a 1/2 teaspoon of salt.
Place the flour on a table in a mound and make a well in the center. Put the eggs and salt into the well. Mix the eggs together with a fork without disturbing the flour. (This is not as tricky as it sounds…)
Using a fork, gently incorporate the flour into the egg mixture a little at a time.
Once you have incorporated all of the flour together with the egg using a fork, use your fingertips to blend the mixture together well.
After the wet and dry ingredients have been combined, form a ball. If the dough seems to dry, add a little more egg mixture. If the mixture is too wet and sticks to your fingers, rub your hands with flour.
Knead the pasta dough for about 7 minutes until the dough is smooth.
Divide the dough into 3 equal sized portions. Cover the dough balls with a towel or bowl and let rest for 15 minutes.
If your using a pasta machine, put it to work.
If you don't have a pasta machine, a rolling pin will work just fine. Roll each ball about 1/16th inch thick, or as thin as you can.
Fold the rolled dough into a square. Cut the open end of the square a quarter inch at a time, into what ever width you choose. Skinny for ‘sketti. Wide for lasagna noodles.
Immediately after cutting the dough, hang the pasta on a dowel or other object (a clothes drying rack works great). You can also lay the pasta flat on a towel, but it is more likely to stick together.
The pasta can be used right away or will keep up to a week.
Enjoy!
Heather
So, in a salute to old Mr. Gibbons, here is my recipe for cattail pasta. I especially like it in a lentil lasagna, but it’s equally good with your favorite sauce. If you already have a favorite pasta recipe, try cutting the flour in half and adding cattail pollen. You may have to experiment to find the best ratio, but it’s worth it.
Pasta is easy to make and economical. If you have a pasta cutter, good on you, but I just cut mine into shapes using a knife.
To make one pound of pasta, you need 1 cups of unbleached flour, 1 cup of cattail pollen 3 large eggs, and a 1/2 teaspoon of salt.
Place the flour on a table in a mound and make a well in the center. Put the eggs and salt into the well. Mix the eggs together with a fork without disturbing the flour. (This is not as tricky as it sounds…)
Using a fork, gently incorporate the flour into the egg mixture a little at a time.
Once you have incorporated all of the flour together with the egg using a fork, use your fingertips to blend the mixture together well.
After the wet and dry ingredients have been combined, form a ball. If the dough seems to dry, add a little more egg mixture. If the mixture is too wet and sticks to your fingers, rub your hands with flour.
Knead the pasta dough for about 7 minutes until the dough is smooth.
Divide the dough into 3 equal sized portions. Cover the dough balls with a towel or bowl and let rest for 15 minutes.
If your using a pasta machine, put it to work.
If you don't have a pasta machine, a rolling pin will work just fine. Roll each ball about 1/16th inch thick, or as thin as you can.
Fold the rolled dough into a square. Cut the open end of the square a quarter inch at a time, into what ever width you choose. Skinny for ‘sketti. Wide for lasagna noodles.
Immediately after cutting the dough, hang the pasta on a dowel or other object (a clothes drying rack works great). You can also lay the pasta flat on a towel, but it is more likely to stick together.
The pasta can be used right away or will keep up to a week.
Enjoy!
Heather
Subscribe to:
Posts (Atom)